If you have ever had to bleed pigs for diagnosing disease on your farm, then you know what a chore it can be. Collecting blood samples required at least two people, a nose snare, ear plugs, needles, and blood tubes. Because collecting oral fluids requires only one person (no needles and no ear plugs), it has become a popular and efficient way to uncover disease on swine farms. This article will discuss the supplies needed and the process for collecting oral fluids.
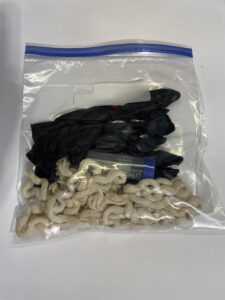
If oral fluid sampling diagnostic testing looks like a good tool for your farm, you must assemble a few supplies. A sample collection kit should include six feet of cotton rope, a gallon zip lock bag, exam gloves, collection tubes, a knife, and a permanent marker. The reason to plan ahead is that 100% cotton rope is sometimes hard to find. Generally, when you find cotton rope, it is a three-stranded white rope. I prefer to unwind the rope and use the smaller individual strands for collecting samples. Below is a picture of a collection kit ready to go. You can also request a ready-made kit (rope, collection tube, and gloves) from Sioux Nation Ag Center.
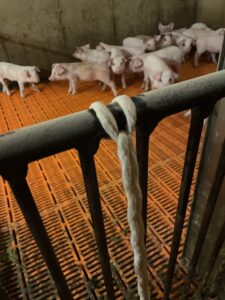
Now that we know what supplies are needed, we must consider the collection process. The first step is to hang the rope in the barn. For the best results, consideration should be given to the location of the rope. You want to avoid feeders and waterers and give pigs as much access to the rope as possible. Usually, this means the gating between two pens of pigs. The easiest way to secure the rope is to hold the two ends together, then take the loop end of the rope, stick it through the gating, and run the two ends through the loop. (Picture below)
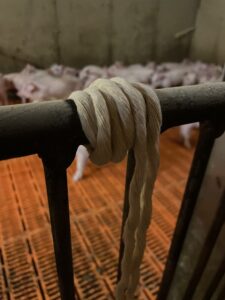
Once the rope is secure, you must ensure it is not in contact with the floor. The rope can be cut off or shortened by wrapping it around the gating. (Picture below)
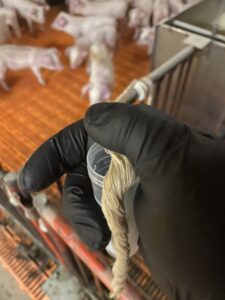
Now that the rope is ready provide 20-30 minutes for the pigs to play with it. Remember to pick a time of day when the pigs are active to collect the sample faster. Once the rope is saturated, it is time to collect the samples. With the rope still secured to the gate, place the rope between the opening on the collection tube and your thumb.
When ready, use your thumb to apply pressure and pull the rope over the far rim of the collection tube, depositing the oral fluid in the tube. (Picture below)
When done with both ends of the rope, 5 to 10 cc of fluid should be in the tube.
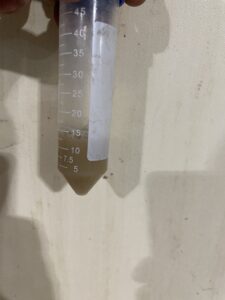
Recap the collection tube, label it with the date and location of the sample, and place it in the zip lock bag with an ice pack. The sample should be kept cool until it is received by the diagnostic lab.
As you can see, this process is an easy and efficient tool for disease monitoring. Often, diagnostic results can be received the same day if the samples make it to the lab by noon.